Answering the common DIY question: flexible quarter round molding is ideal for tight corners, curved surfaces, and quick peel-and-stick upgrades. This guide highlights five versatile options suited for contractors, renters, and homeowners tackling curved stairs, baseboards, countertops, and wall seams. Each product is chosen for easy installation, strong adhesion, and adaptability to curved or irregular edges. A quick comparison table below helps you decide which trim best fits your project and space constraints.
| Product | Best For | Material/Adhesive | Length |
|---|---|---|---|
| YIYAO White Flexible Quarter Round | Curved corners and walls | Vinyl, self-adhesive | 5 ft |
| Conwang 118” Flexible Round Trim | Stairs, columns, walls | Silicone rubber, self-adhesive | 118 in |
| KNEELISA White 118” | Cabinets, baseboard edges | Silicone, double-sided adhesive | 118 in |
| Risunpet 0.25″ x 0.25″ Mini Trim | Fine seams and tight gaps | Self-adhesive | 10 ft |
| ESUFEIR 118” Crown Molding | Bathrooms and kitchens with gaps | Silicone, adhesive | 118 in |
YIYAO White Flexible Quarter Round Molding

Best for: quick fixes on smooth walls and plane corners where you need a subtle edge that blends with any décor. Why selected: this trim is flexible enough to adapt to curved spaces and corners, reducing visible gaps. The adhesive eliminates the need for drilling. Limitation: surface preparation and heating with a hair dryer improve bonding on colder days.
Conwang 118-Inch Flexible Quarter Round Molding

Best for: curved stairs, columns, and varied surfaces where extra softness and bendability aid adhesion. Why selected: long 118-inch length reduces seams across larger runs, and the winged interior helps the trim hug irregular edges. Caution: ensure the surface is clean before applying for best adhesion; some users may need to press firmly to set the final seal.
KNEELISA White Peel & Stick Quarter Round

Best for: edges near cabinets, countertops, and skirting boards where a slim profile and invisible finish matter. Why selected: features a 15mm x 20mm right-angle design with strong double-sided adhesive; warmer conditions can improve bonding. Limitation: verify gap size before purchasing to ensure the strip will fit the intended edge.
Risunpet 0.25″ x 0.25″ Mini Quarter Round

Best for: narrow seams and fine edges where a low-profile finish is desired. Why selected: ultra-slim 1/4″ profile fits tight spaces like countertop seams or cabinet joints. Adhesive installs without nails. Limitation: not ideal for large gaps or heavy load-bearing trims.
KNEELISA Black 118” Flexible Trim
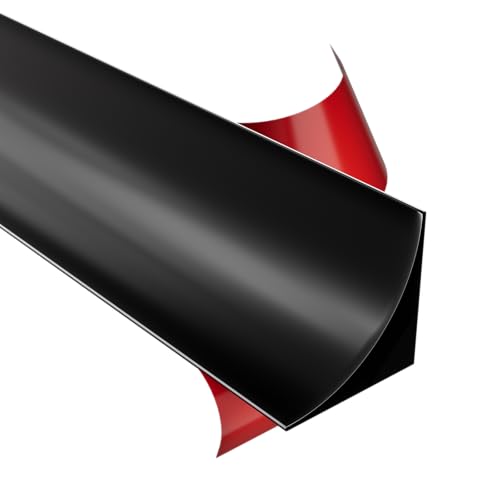
Best for: contrasting spaces where a bold edge helps define shapes or architectural lines. Why selected: same right-angle profile and strong adhesion as the white version, with a color option for design variety. Caution: verify fit and set time when applying in colder environments to avoid premature detachment.
KNEELISA 236-Inch White Trim Roll
Best for: longer wall runs or multiple rooms where runs can be joined with fewer seams. Why selected: extended length reduces the number of cuts and waste; adhesive remains strong across long installations. Limitation: ensure wall smoothness and cleanliness to prevent air pockets along long stretches.
Buying Guide
What to consider when choosing flexible quarter round molding:
- Material and adhesion: Look for vinyl or silicone with a reliable adhesive. Silicone variants often perform better in bathrooms or kitchens with humidity.
- Size and profile: Confirm width and height match your edge gaps. Narrow profiles work best for fine seams; larger profiles cover bigger gaps.
- Flexibility: Higher flexibility helps with curved surfaces and irregular corners, but may be less sturdy in high-traffic areas.
- Length and seams: Longer rolls reduce joints but require straight runs. Plan seam locations to minimize visual breaks.
- Surface prep: Clean, dry, and smooth surfaces ensure stronger adhesion. Heating with a hairdryer can improve bond in cool environments.
Practical tips for installation
- Measure twice, cut once: Accurately size each piece for a clean fit along walls, edges, and corners.
- Test fit before peeling backing: Dry-fit the segment to confirm alignment and curvature.
- Peel-and-stick steps: Clean surface, peel backing, press firmly from one end to the other to avoid air bubbles.
- Heat for better adhesion: A light heat helps the adhesive settle into curved edges or tight gaps.
FAQs
- Q: Is peel-and-stick molding durable for high-traffic areas? A: It provides quick updates and works well for light-to-moderate traffic, but consider a more rugged solution for heavy-use zones.
- Q: Can these trims be painted? A: Many are vinyl or silicone and may accept paint with proper prep; check product guidance before painting.
- Q: Do I need tools beyond scissors and a hairdryer? A: No drilling is required for peel-and-stick options, making installation simpler for non-professionals.
- Q: How do I handle corners and curves? A: Use heat to soften the material and gently press along the curve for a seamless fit.
- Q: Are these trims suitable for bathrooms? A: Silicone-based options generally perform better in moist environments; verify the material compatibility for your space.
- Q: What if the trim doesn’t stick initially? A: Clean the surface, re-press firmly, and consider applying warm air to help set the adhesive.
By selecting flexible quarter round molding that matches your space, you can achieve clean, professional-looking edges with minimal tools. The options listed cater to a range of applications—from tight seams and curved stairs to large wall runs—while offering practical installation guidance to ensure a successful outcome.